How Do I Install and Set Up an eSIM on My Android Device?
This help guide walks you through the steps required to install an eSIM on an Android device. The guide was created using a Samsung Galaxy S21 with the most recent version of Android software available at the time, Android 13.
There are two installation options offered in this guide: either 'Install using a QR code' or 'Manual installation.'
Before starting the installation, ensure you have the following:
-
A strong internet connection – Ideally using a Wi-Fi network.
-
An eSIM-compatible device – If you're unsure, a list of supported models is provided here to help you check eSIM device compatibility.
-
The device is not locked to one particular network - If unsure, an article has been provided to talk you through how to determine the "locked / unlocked" status of a device, click here
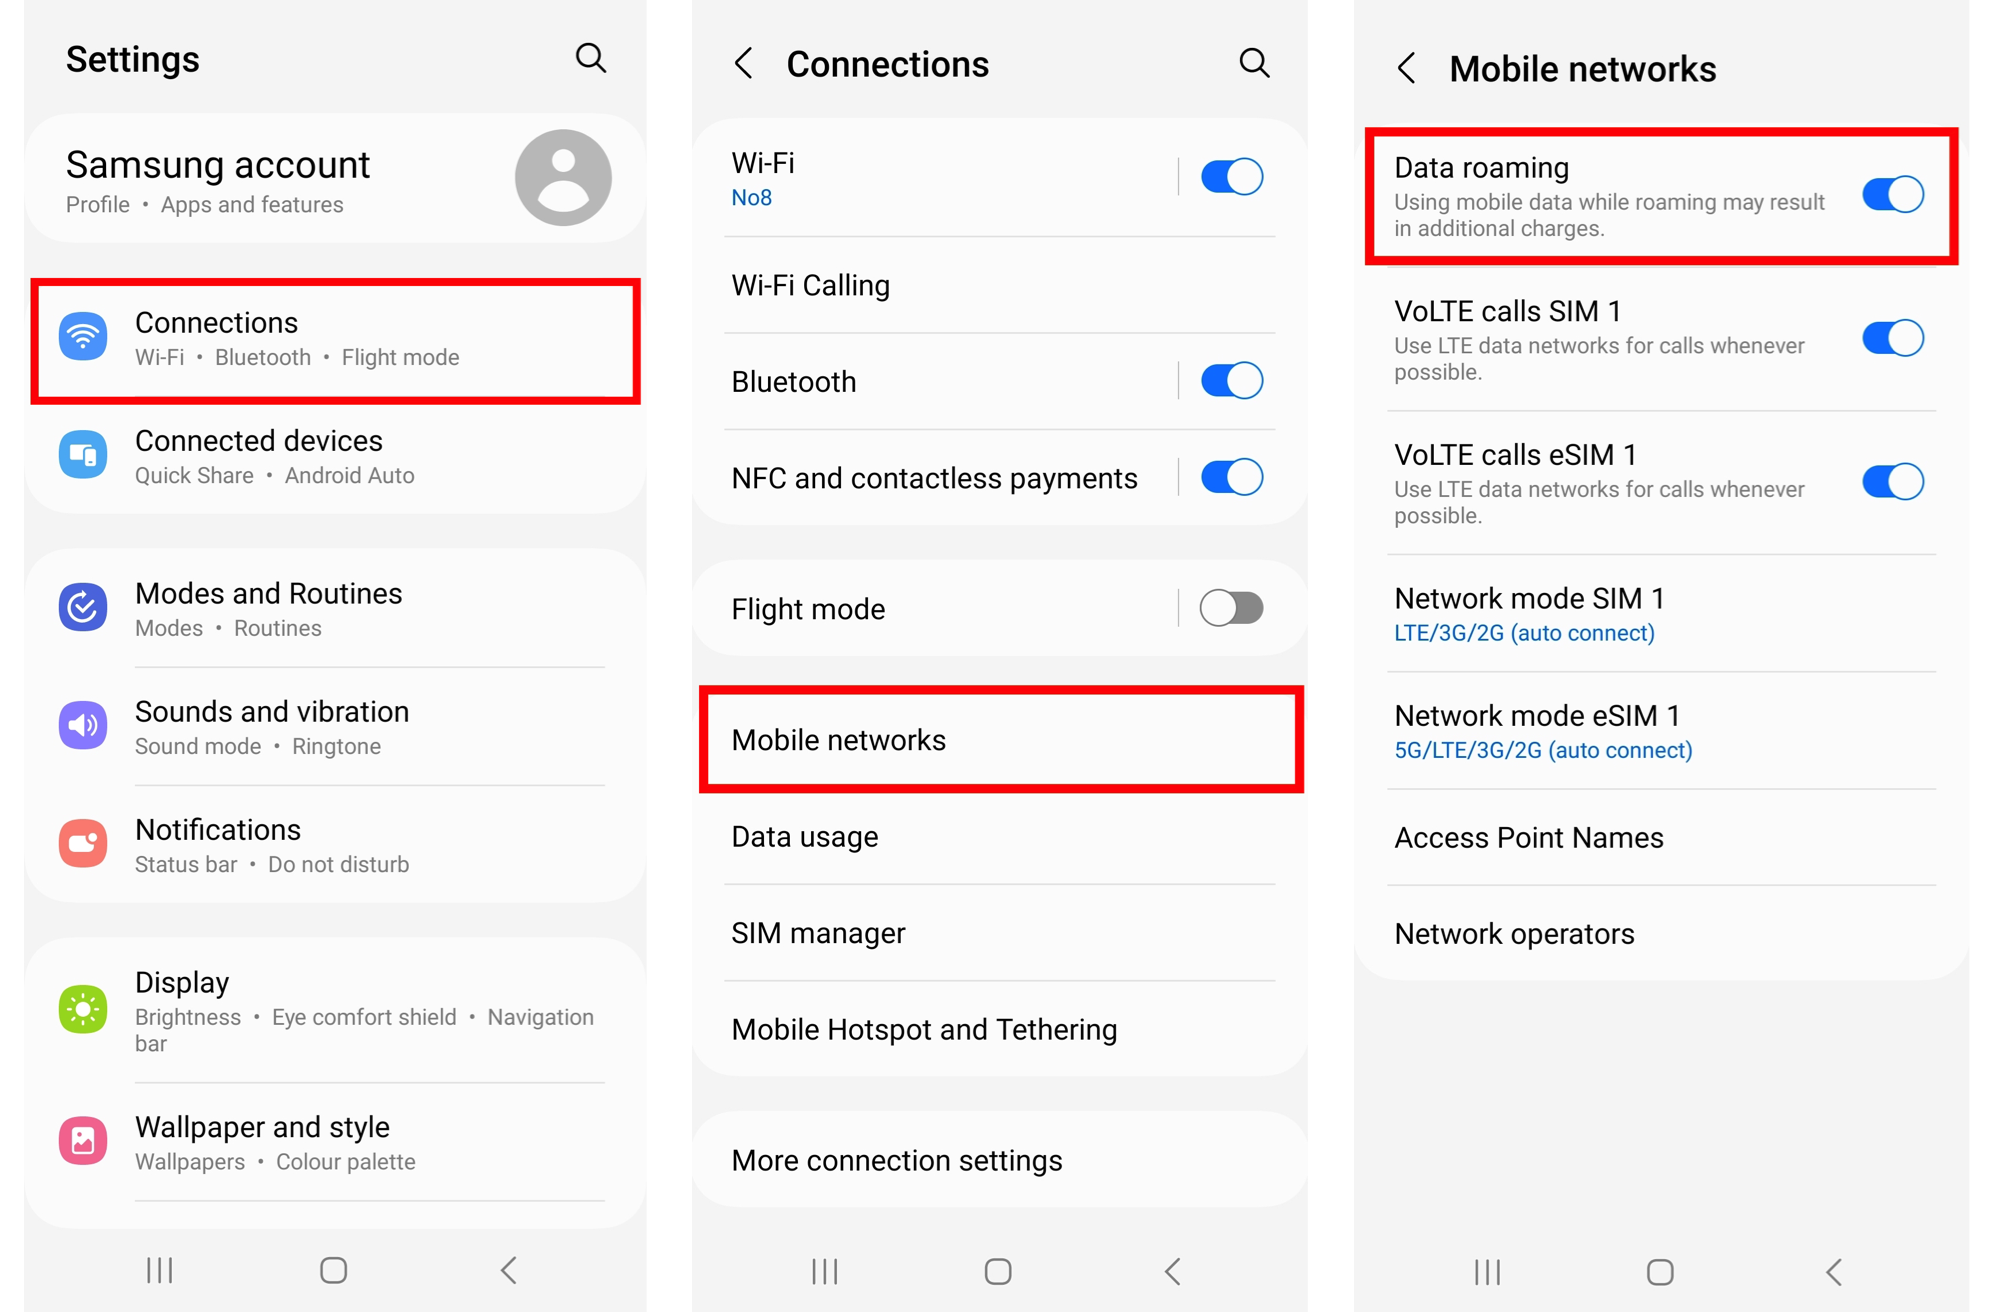
Don't forget to turn on "Data Roaming" after install!
Install Using A QR Code
Step 1.
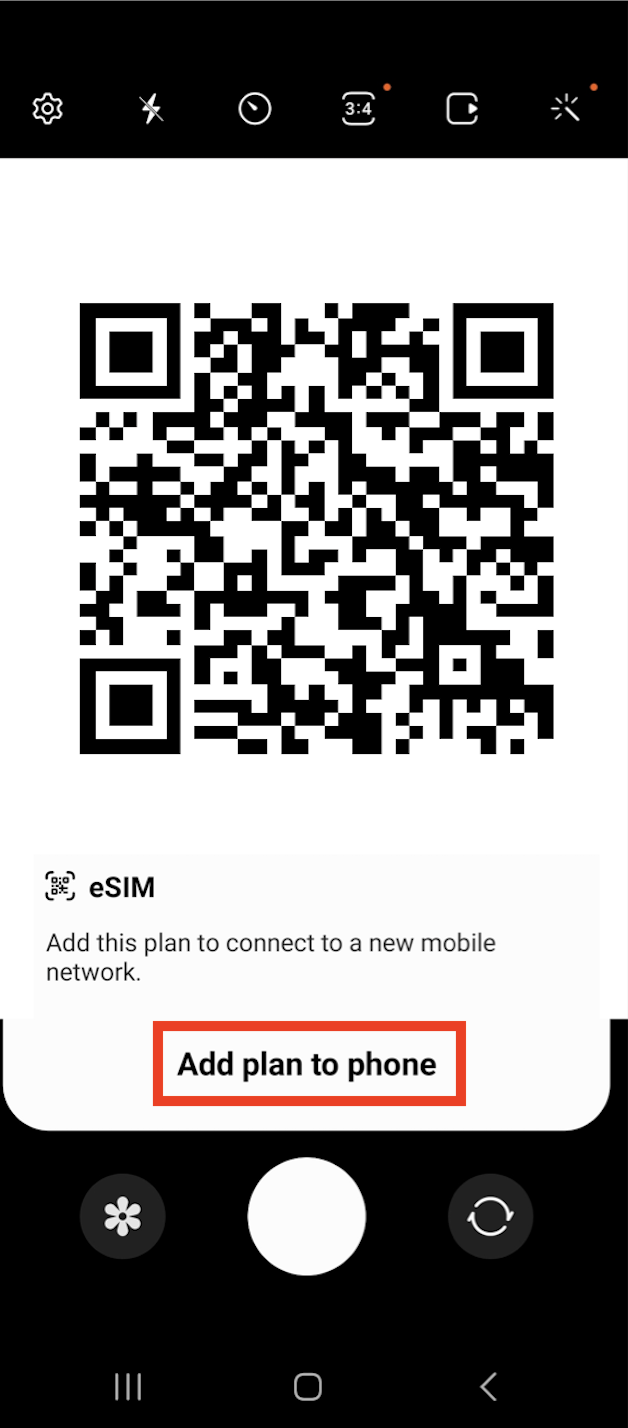
Scan the QR code, there are two options for scanning;
Either
1.1) Open camera > Scan QR > Tap "Add plan to phone"
Or
1.2) Go to Settings > Connections > SIM manager > Add eSIM
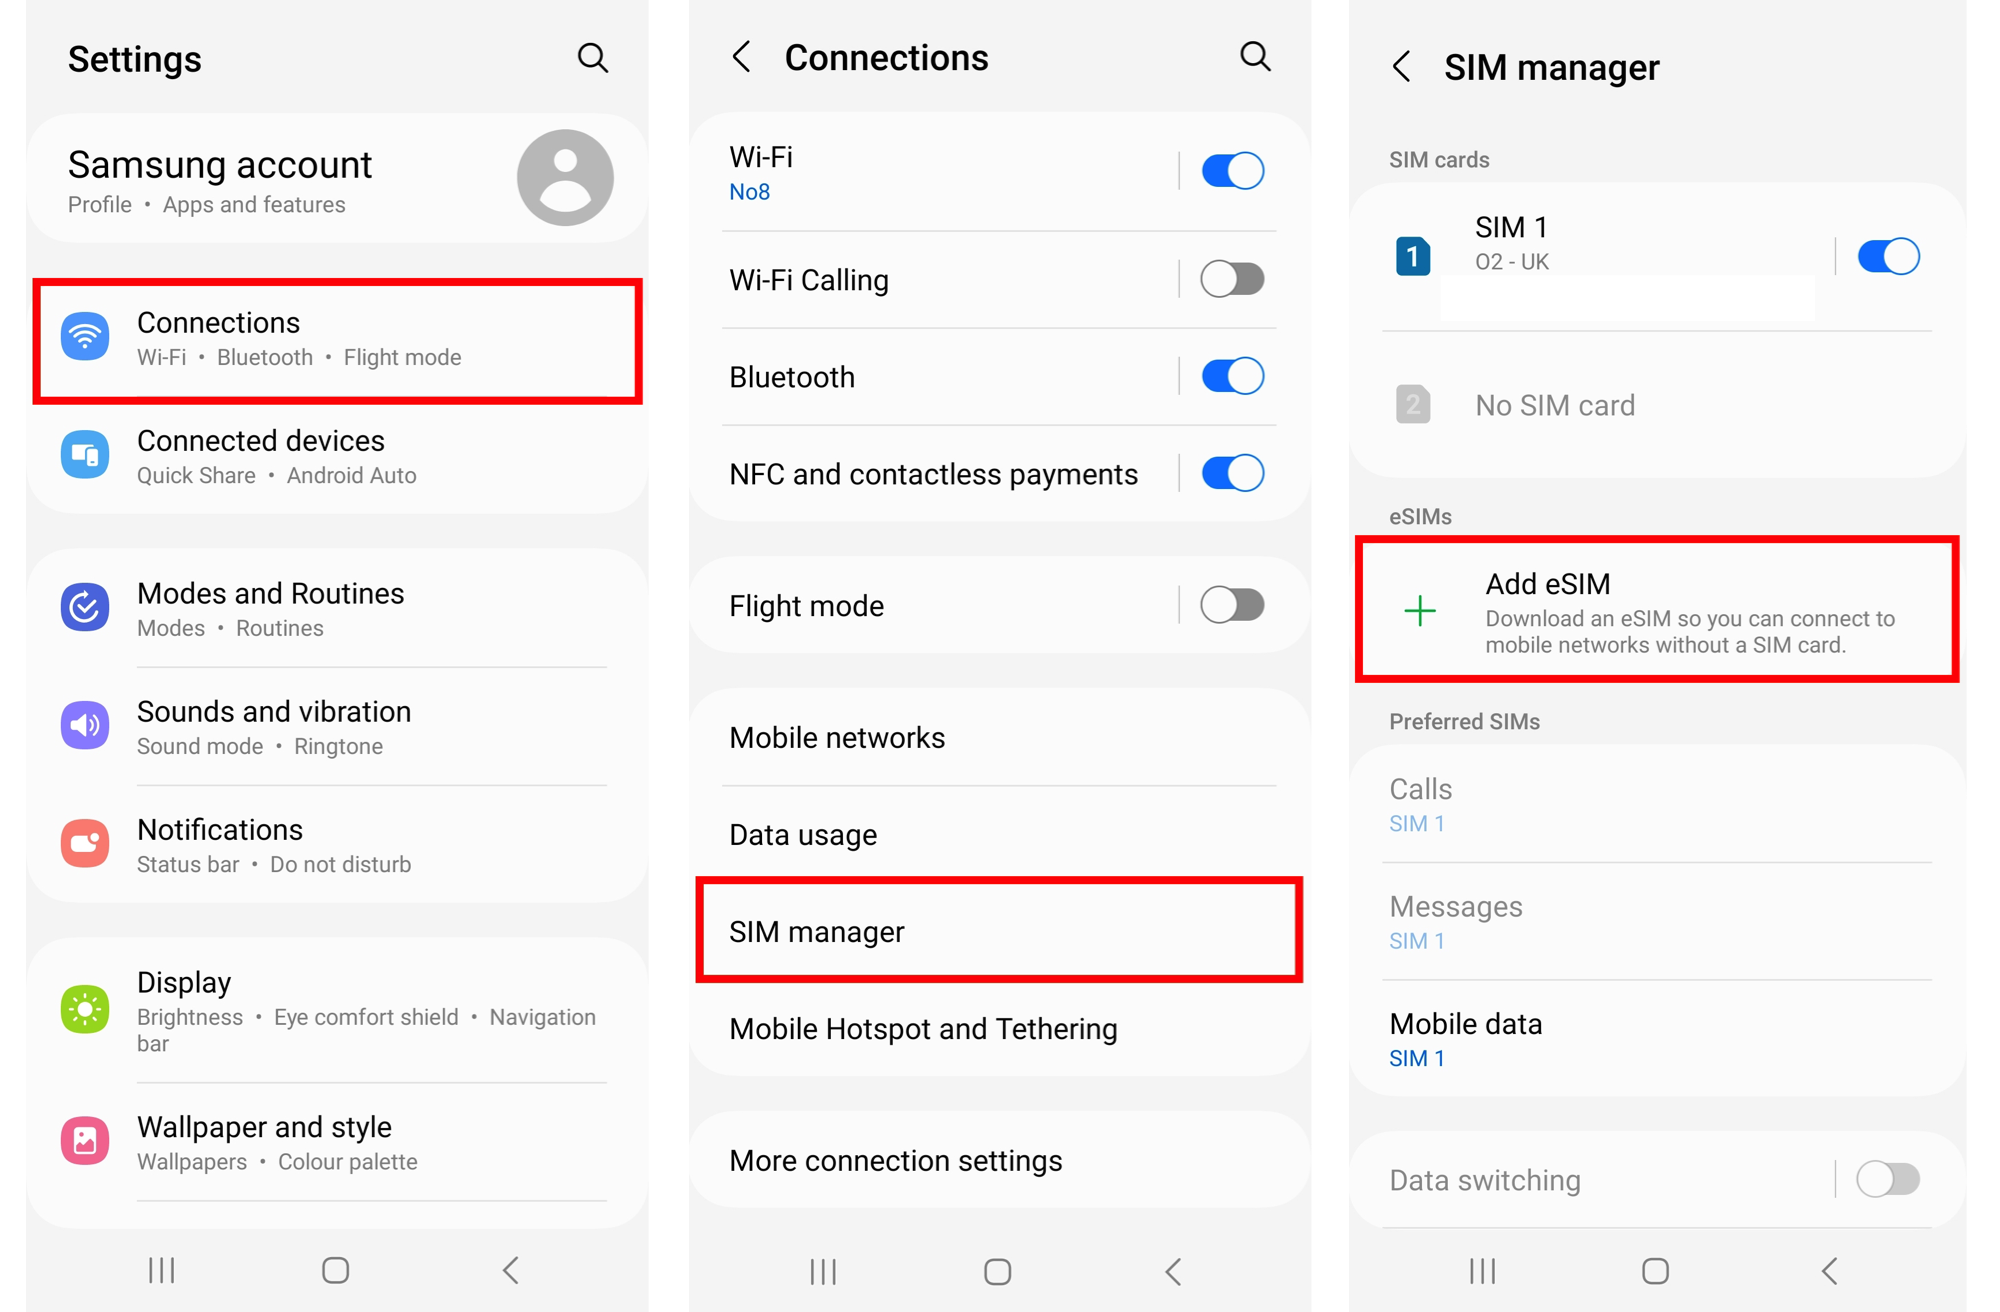
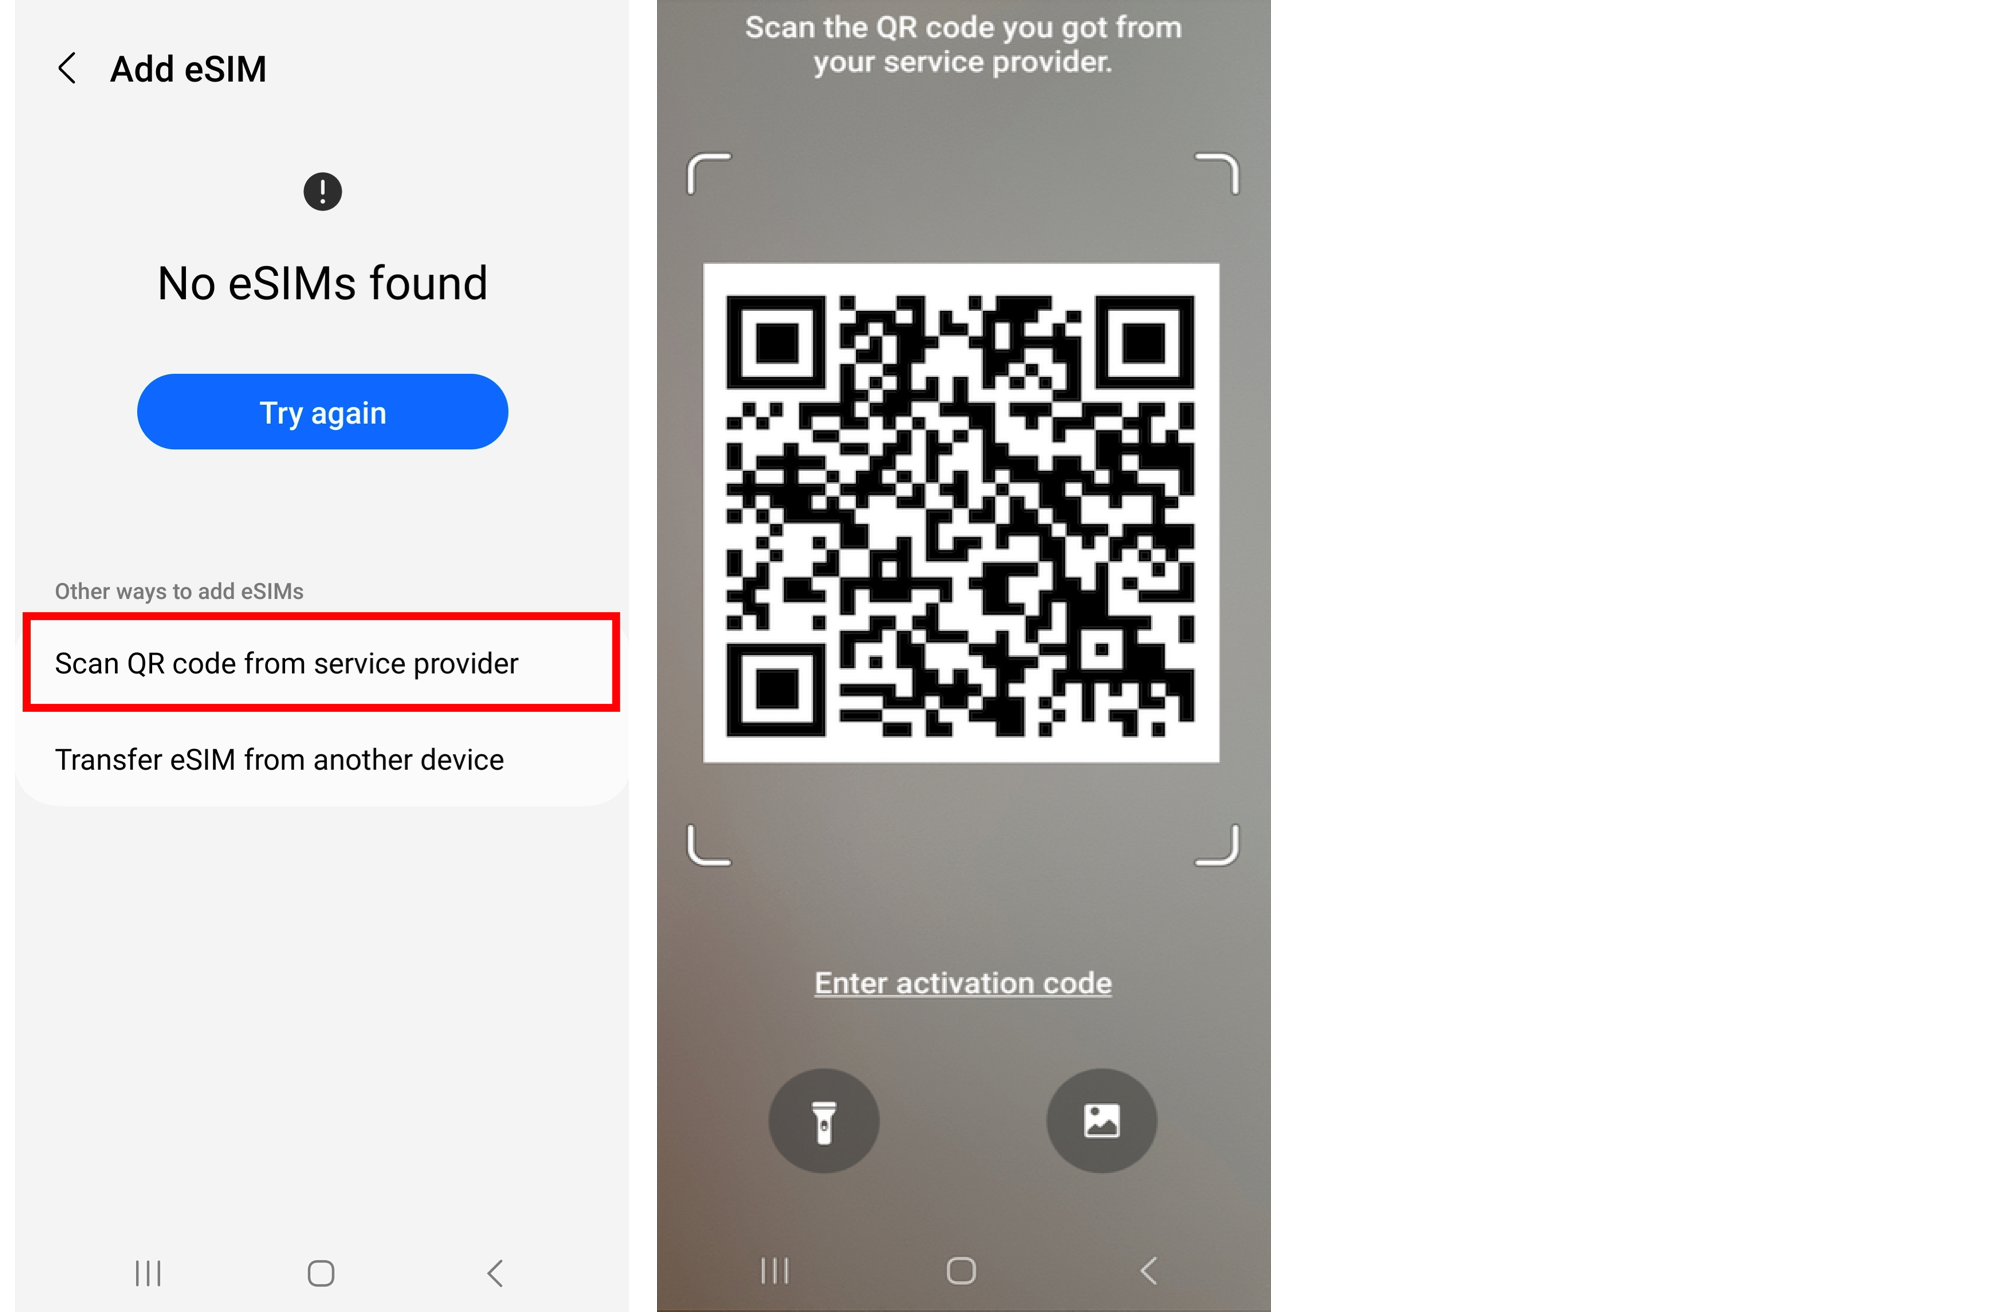
Then tap "Scan QR code from service provider" > Now scan the QR code provided
Step 2.
When prompted, tap "Add" > Allow up to 10 minutes for the eSIM to activate > Tap "Done"
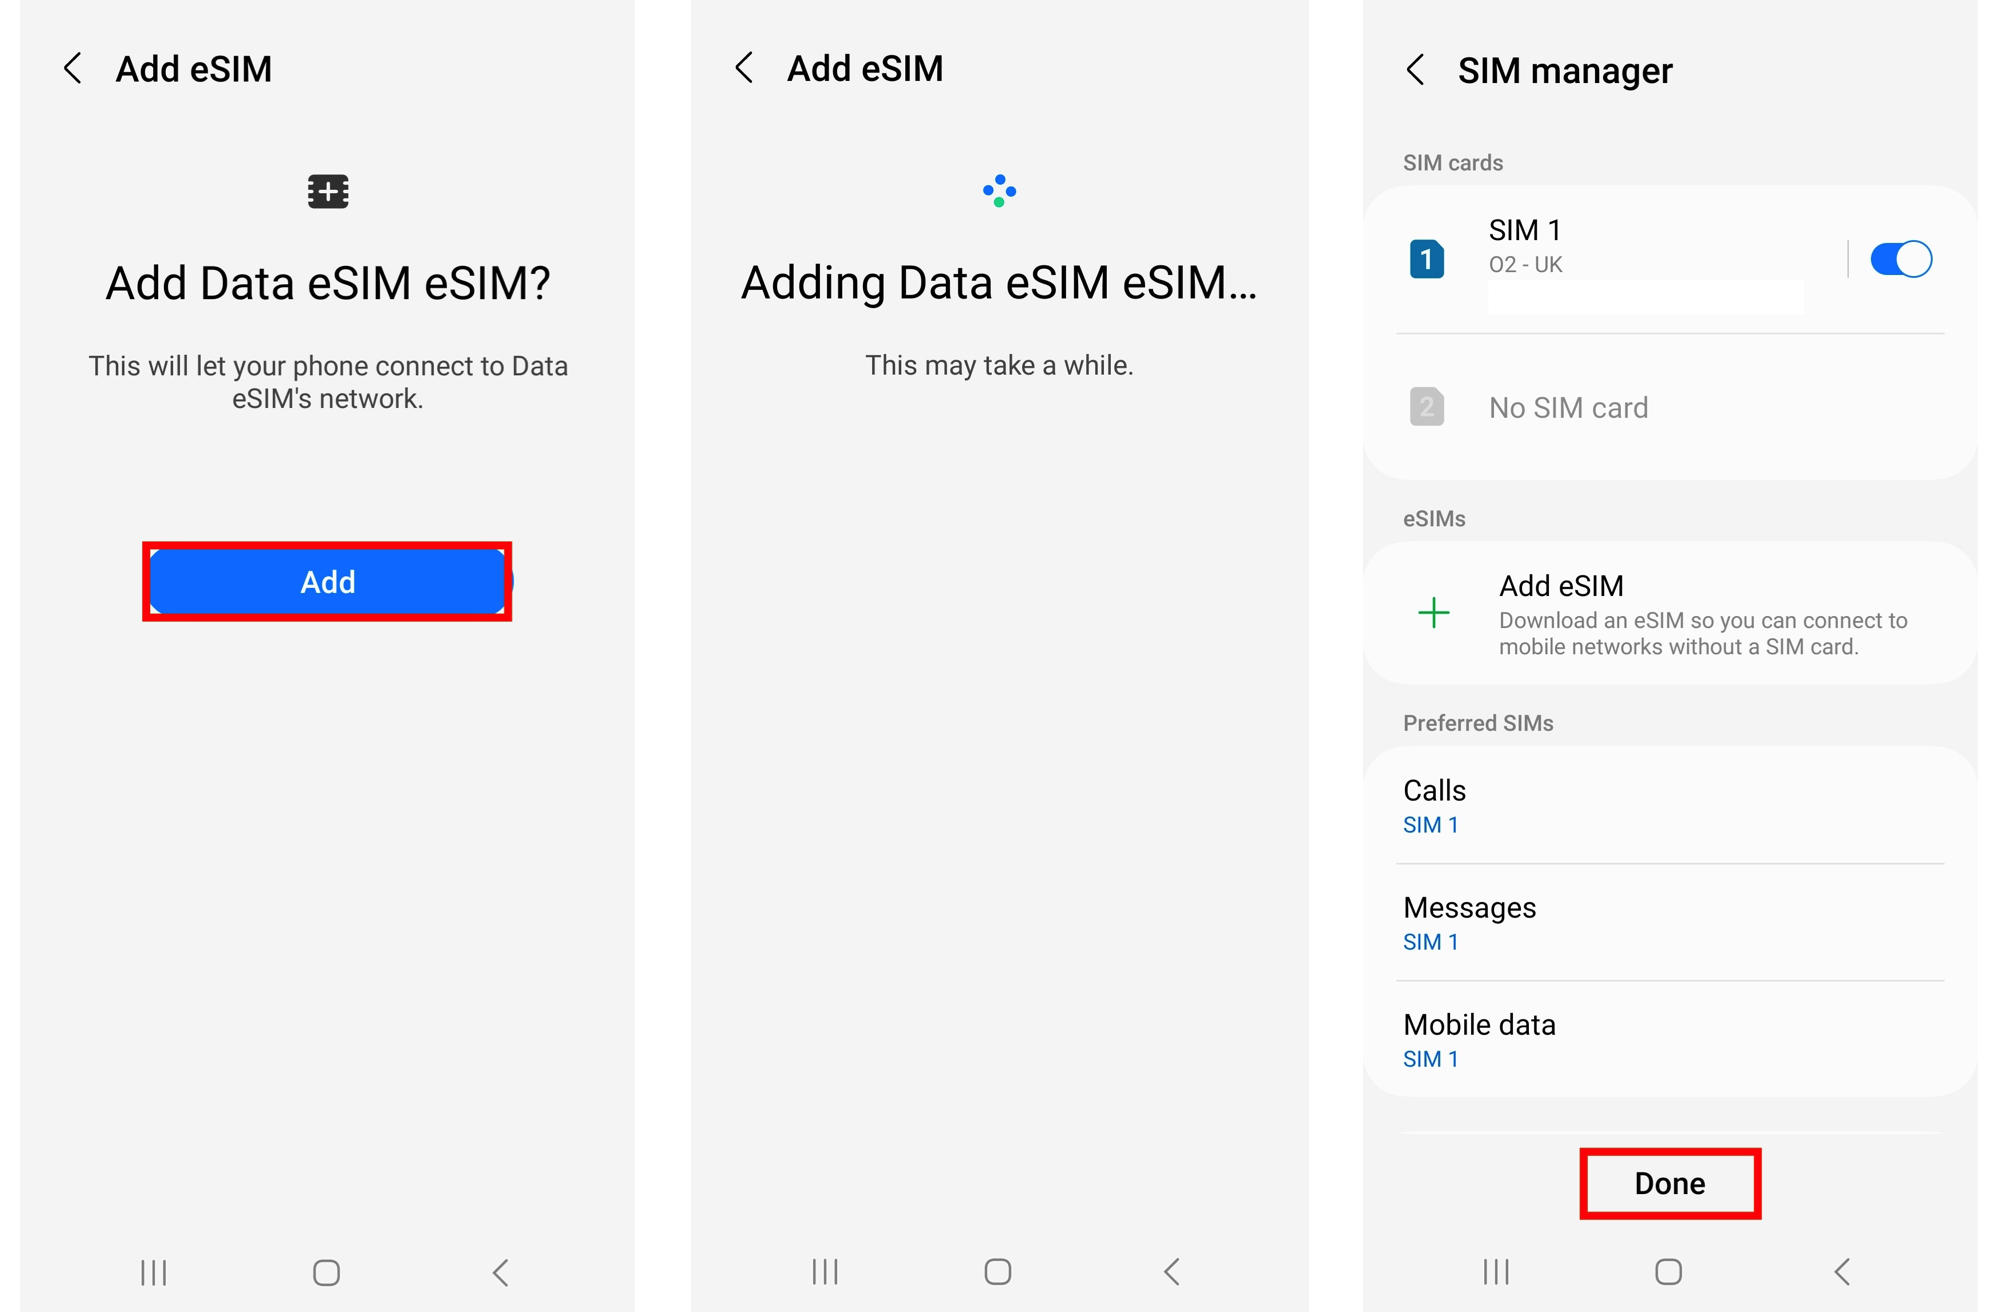
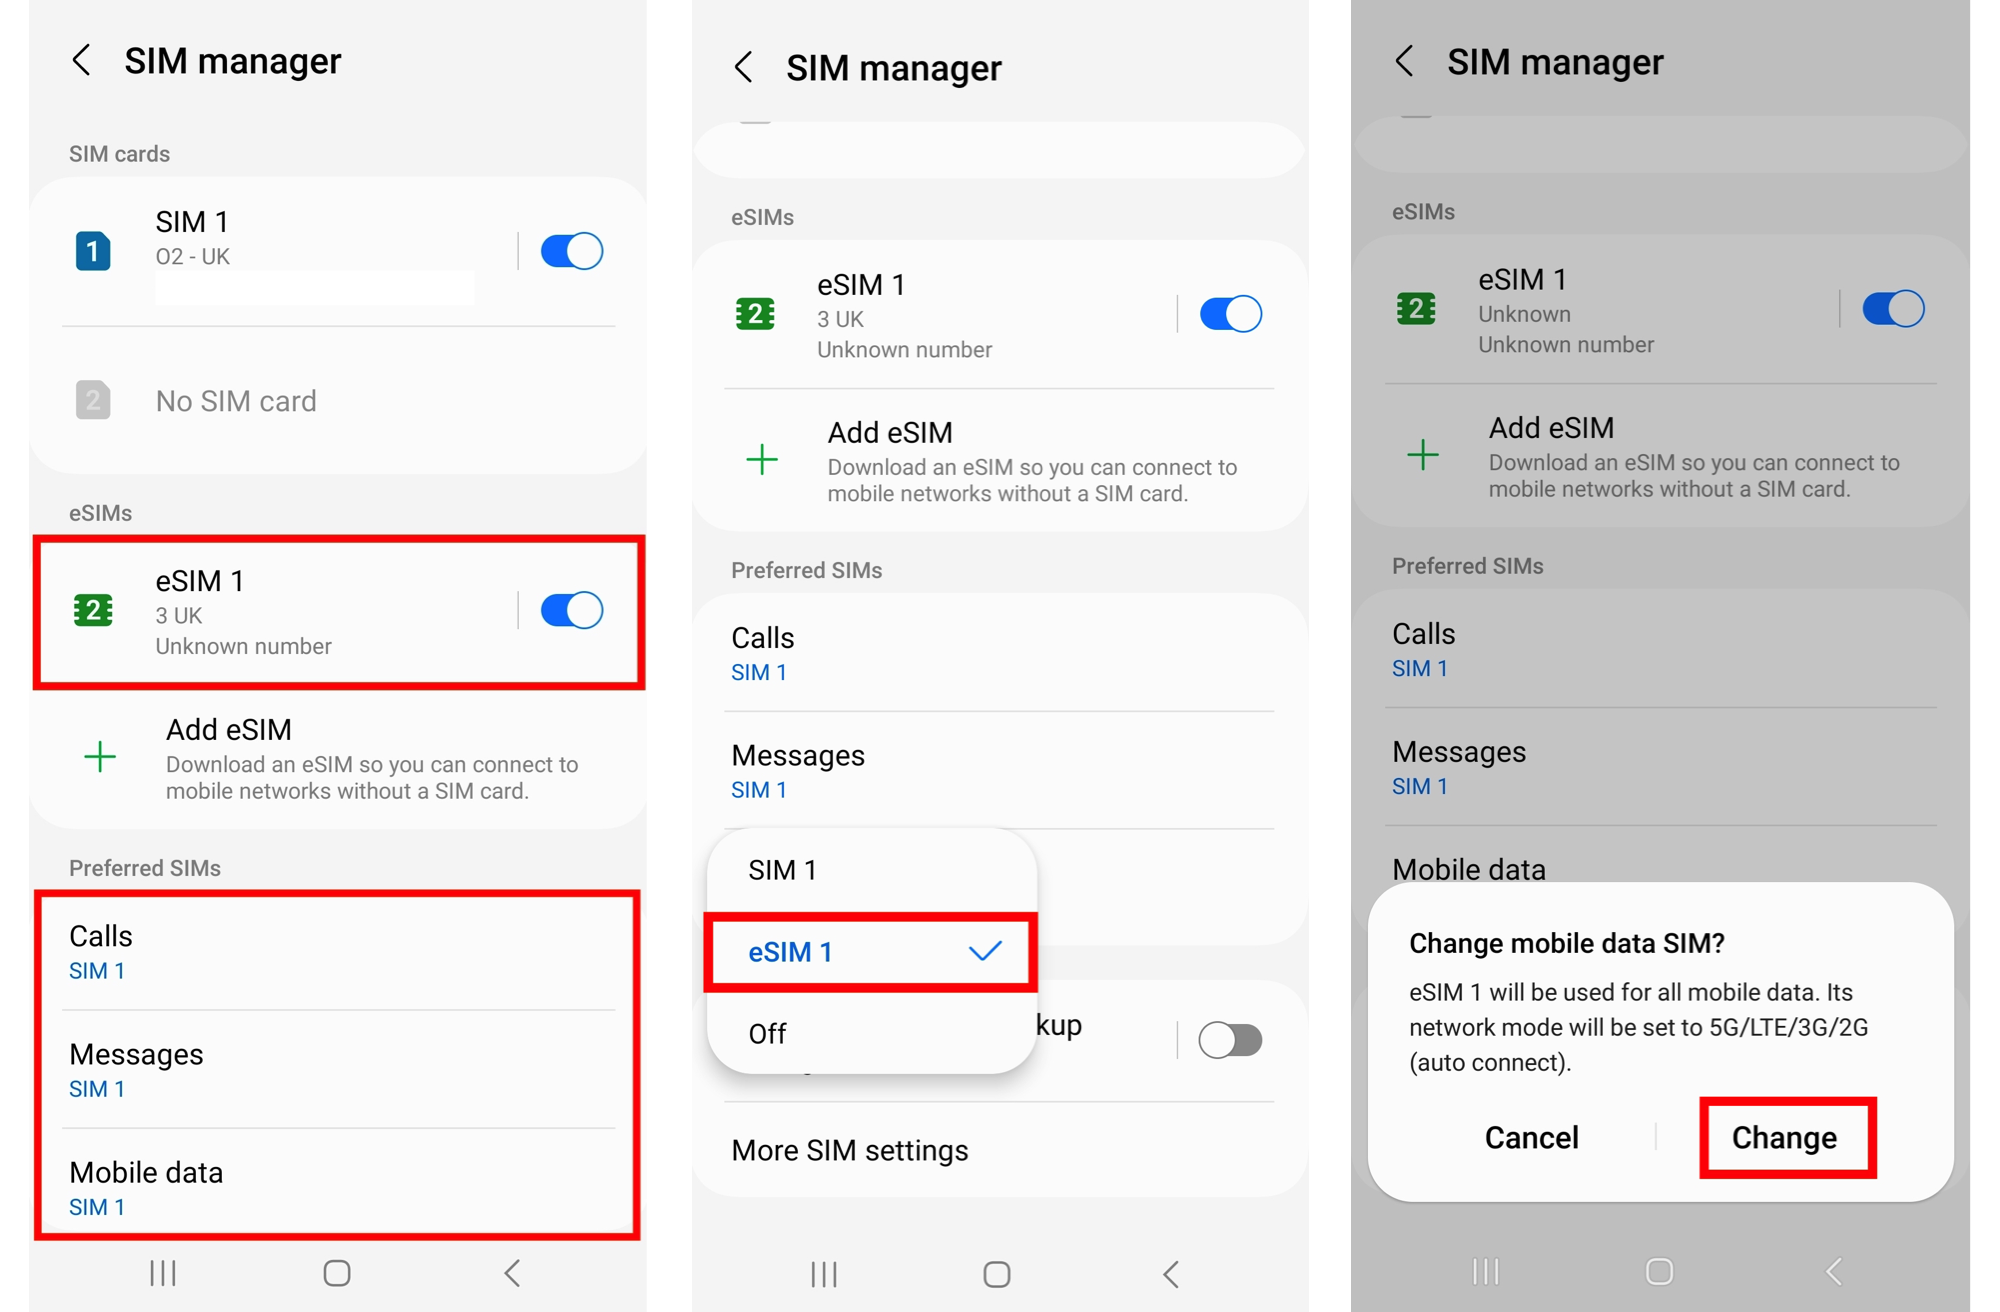
Step 3. - Now configure your SIM / eSIM settings correctly
3.1) Leave "Calls" and "Messages" set to your original primary SIM
3.2) Tap "Mobile Data" > Select the eSIM > Tap "Change"
Step 4. - Ensure Data Roaming is Active
Go to "Settings" > Connections > Mobile networks > Ensure "Data roaming" is turned on